When PMU Goes Wrong
When applied correctly, permanent makeup has the power to enhance a client’s natural features and boost their self-confidence. However, as with any procedure there are risks involved and sometimes things can go wrong.
In this blog post, we will cover the most commonly experienced issues in permanent makeup, the steps you can take to avoid them and what to do to correct PMU problems when they arise. So let’s get into it!
What are the most common problems with PMU?
If you’re performing permanent makeup procedures on clients, it’s important to be aware of what can go wrong, and how you can avoid it!
- Scarring: there are several ways this can happen, and most of them come from inadequate training. Going too deep into the skin layers can cause damage that leads to scarring, in both microblading and PMU treatments, but poor aftercare can also contribute to scarred results.
- Allergic reactions and infections: there’s no way around it - it’s your job as a PMU artist to make sure that you’ve patch tested your clients before the procedure, and that your health and hygiene standards are high enough to prevent infection. While infections can occur outside of your clinic due to bad aftercare, you play the biggest part in stopping this!
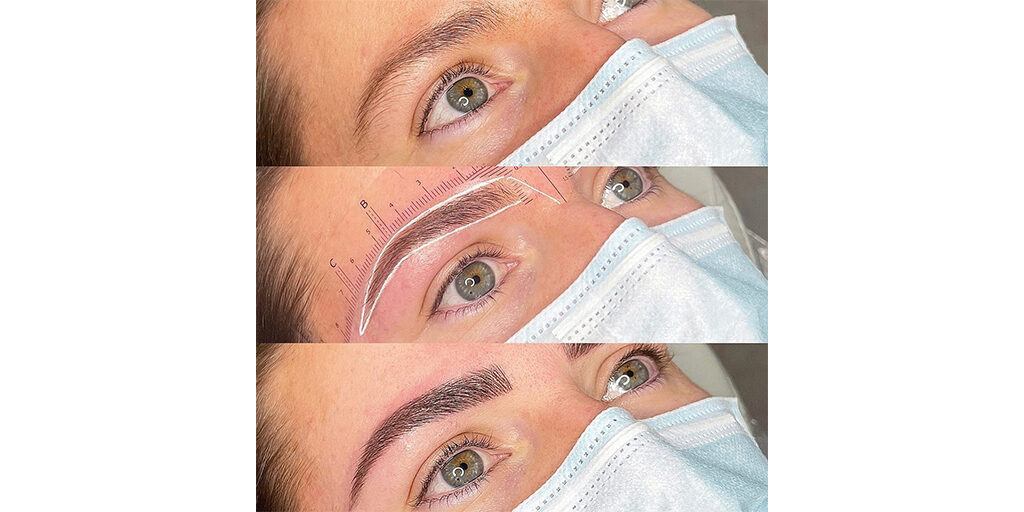
- Wrong shape: adequate training with the right instructor will drill in the importance of a mathematically-precise mapping and pre-draws before the needle ever touches skin.
- Unwanted tones: colour theory is a huge part of PMU, and you’ll need to understand how the pigment will appear underneath the natural undertones of your client’s skin. Without proper planning, pigments may heal to unnatural and unwanted tones.
- Pigment migration: sometimes pigment can disperse within the skin over time, leading to distortion or blurry finishes. Avoiding migration comes down to an understanding of skin type, implantation depth and pigment quality, but also knowing that areas like the eyelid and brow are more likely to suffer from pigment migration, and adjusting your technique accordingly.
- Rapid fading: while permanent makeup isn’t really permanent, it should be relatively long-lasting, which is why quick fading of the pigments may indicate something has gone wrong. This will likely be to do with the depth of implantation, or the quality of the pigment or lack of aftercare.
How can you avoid PMU treatments going wrong?

Adequate Training
Every artist working in the PMU industry should go through extensive training with a qualified, fully accredited and reputable trainer or academy. You should do plenty of research to find a course that’s highly recommended, with a history of students who have gone on to be successful PMU artists.
PMU training is far more than how to hold a machine or how to tattoo the skin - it also encompasses colour theory, mapping and pre-draw, pigment selection, technique, and how to get the best aftercare.
Ideally you’ll be able to stay in contact with your trainer or academy to get further information and advice - a helping hand will prevent you from making serious mistakes when you first start!
Managing Expectations
PMU is an enhancement but it won’t transform your client’s entire appearance, so setting expectations with your client is incredibly important to helping them feel comfortable with their results. Of course it’s your job to get the right colour, but your client’s expectations may not match your own, which can lead to problems down the line.
An in-depth consultation will help you understand your client’s desired result and also spending time on pre-draw and getting their full approval is key. Looking at your previous work together can help them to understand how they might look, but it’s also about managing their expectations of aftercare, and how long they’ll be dealing with the healing process - which is, frankly, not the best look for anyone!
Hygiene
It’s essential that your clinic or workspace meets the health and hygiene standards necessary to get your licence to work - but even once you’ve got your licence, you need to maintain those standards!
Set yourself an in-depth cleaning regimen inbetween clients and do it exactly the same every single time. You should also make sure to adequately cover your work station and machines, and use high-quality gloves, PPE and disinfectants to remove contaminants.
Beyond your clinic, you’ll need to educate your clients on the correct aftercare, especially keeping the area clean and dry. Check out our full blog about permanent makeup aftercare to learn more about the stages of healing and how to spot infections!
Mapping & Pre-Draw

Getting your pre-draw perfect is essential to creating incredible permanent makeup!
Unlike tattoos where the image usually appears as though placed on the skin, PMU is designed to complement the facial features already present - and when it’s done incorrectly, the results can be disastrous.
The other benefit to a pre-draw process is that your client gets a good look at their expected results, and can weigh in on whether they feel it’s a good look for them. Never start working on a client until you have their approval!
The best way to understand mapping techniques is to get as much experience on different face shapes and bone structures as possible, and investing in high-quality mapping and pre-draw tools like our own Killer Beauty eyebrow rulers, Biotek callipers, and Glovcon eyebrow mapping string!
Colour Theory
As discussed in our blog on Permanent Makeup Colour Theory, there’s a lot that goes into picking the right colour pigment for your client!
You’ll need a solid understanding of pigment science, as well as the colour wheel and your client’s skin tone and undertones, as all of these factors come together to create the finished result.
Modifiers and correctors will soon become an essential part of your setup, as you’ll soon find that even with the wide variety of pigments on offer, skin tones are so unique that you’ll often need to utilise a modifier.
Ideally you should have enough of an understanding of both colour theory and pigment science to be able to carry out procedures on clients with any skin tone - that’s what we call Beauty Inkclusivity!
Equipment Quality
Even experienced, well-trained PMU artists will find that the quality of their equipment has a huge effect on the quality of their finished results.
It’s tempting to go for a cheaper machine - especially when you first start working - but investing in high-quality products is essential to your business, reputation, and client results.
We’d advise all PMU artists to pick up a high-quality machine from a brand like Microbeau, Bishop or Peak to avoid the issues most commonly seen in cheap machines such as fluctuating motors, inadequate needle depth adjustment, and potential pigment backflow.
Your needle cartridges should be high quality, single-use, and come sterilised in a blister package to ensure they’re safe once you pop them out. They should always contain a safety membrane, not just for hygiene purposes, but to prevent damage to your machine.
Pigments are also an area to spend a little more money - after all, that’s the longest-lasting part of the treatment! Low quality pigments may have issues with dispersal, may heal to unexpected tones, and may even be made with harmful ingredients that cause reactions in your client’s skin.
Pigment Science Education
Understanding what makes up a pigment - from the carrier fluid to the inorganic or organic nature of the pigment itself - is vital to understand how to implant it correctly. Luckily, most pigment manufacturers will include the relevant information on carrier fluid, opacity, and warmth.
We’d always suggest that new PMU artists predominantly work with inorganic-based pigments, as they fade more quickly and tend to have a more subtle appearance. You can build up to using organic pigments when you have more experience correcting your previous treatments.
Alternatively, you could go try out the Tina Davies FADE set, which is made specifically so that the pigments will fade gently over the next 12-24 months!
Read our blog on Permanent Makeup Colour Theory for more information, or find out all about our favourite inorganic pigment Titanium Dioxide!

Treatment has gone wrong – what do I do now?
Sometimes you can do everything right, and the treatment still doesn’t come out as planned!
Luckily, that’s what top-up appointments are made for. While you’ll want the treatment to look amazing straight away, it can be hard to tell on a new client just how the effect will look once healed, so it’s often better to go smaller and more subtle on the first round.
Being conservative and fixing up the treatment afterwards is always better than going too bold too fast, which may result in the need for removal.
Completing a PMU removal course can help you to fix up previous mistakes by yourself and other artists, either by laser or saline removal.
Laser PMU removal is becoming more popular, with new technology making it possible to target smaller, lighter coloured areas with precision while avoiding damage to the surrounding areas. For some treatments, especially microblading gone wrong, saline may be a quicker and easier way to remove the pigment, as it works through osmosis rather than waiting for the body to clean up the leftover pigment.
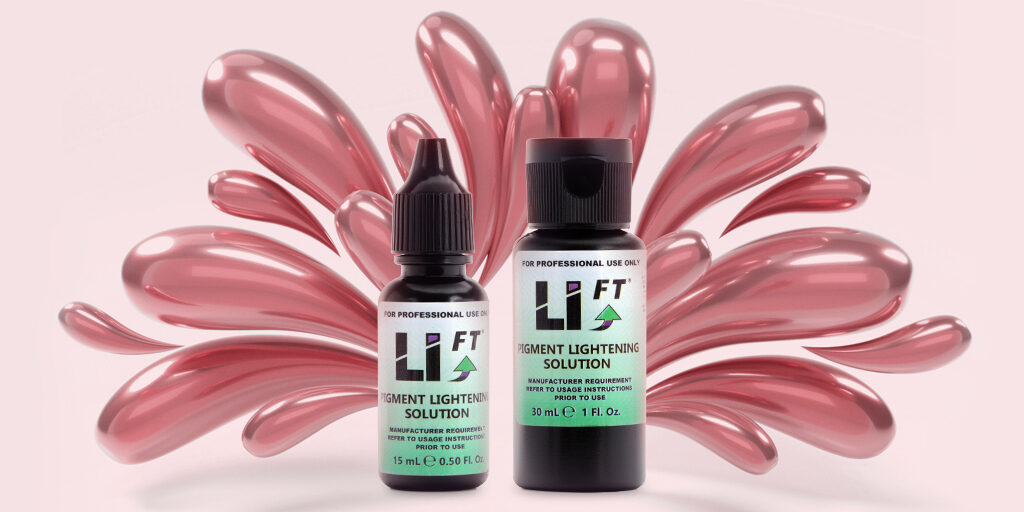
Artists who are trained in Li-FT Saline Removal can pick up the Li-FT Pigment Lightening Solution, one of the safest and most natural ways to effectively remove PMU and microblading pigments!
There are also ways to remove pigments using chemical treatments - these will work similarly to saline, but with an added chemical component to help break down the pigments to make osmosis easier.
Hopefully with our advice you can lower the chances of your permanent makeup treatments going wrong, and know how to fix them when they do!


